Last week I got a really interesting request from one of my customers. Send a reminder based on a SharePoint List / Microsoft List.
One question that came up to me was. Can I send a calendar entry with the reminder mail? Here is how it’s done.
List Setup
The list setup is pretty simple in this demo. I created a list with the following fields:
- Title
- Description
- Start Date
- End Date
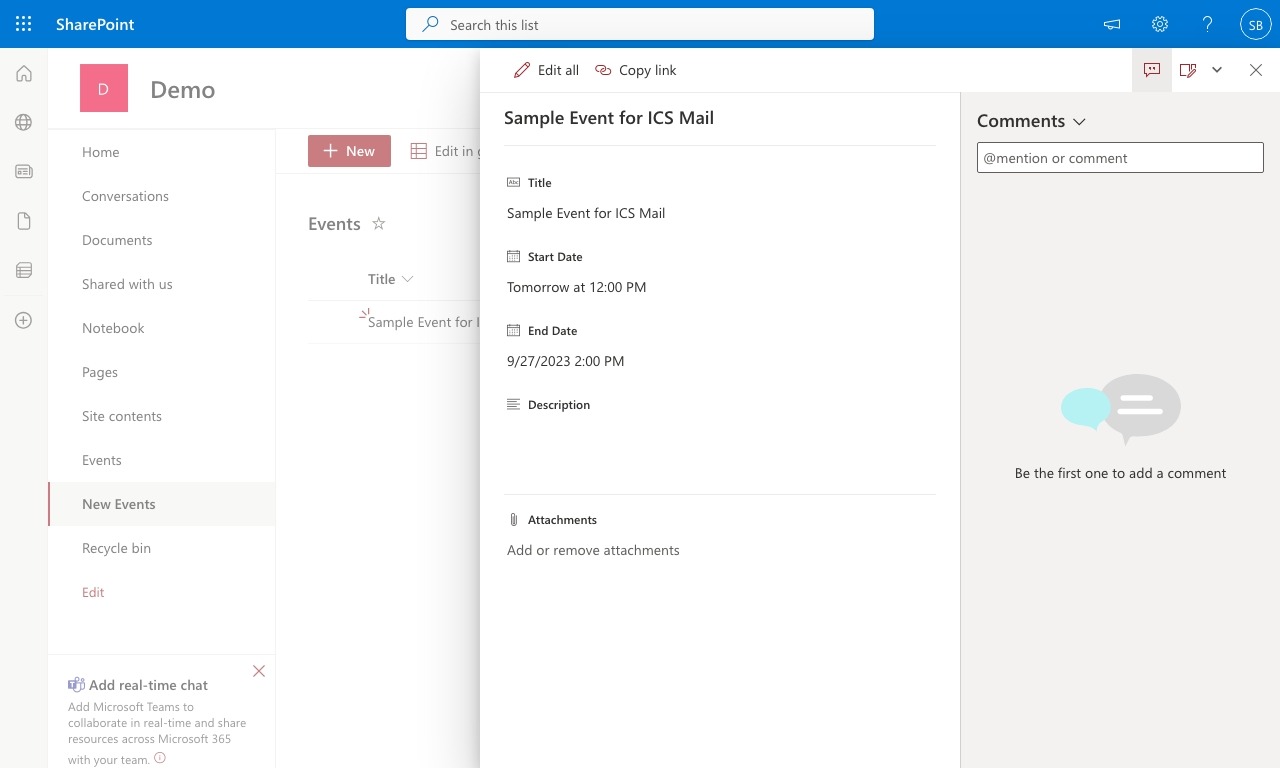
Event List in SharePoint as source for Power Automate flow
This is the least amount you need to create a calendar event dynamically.
Power Automate Flow
I want to send the reminder daily, so I set up the workflow with the recurrence trigger. I then added a step which gets the first item from the list and sends an email.
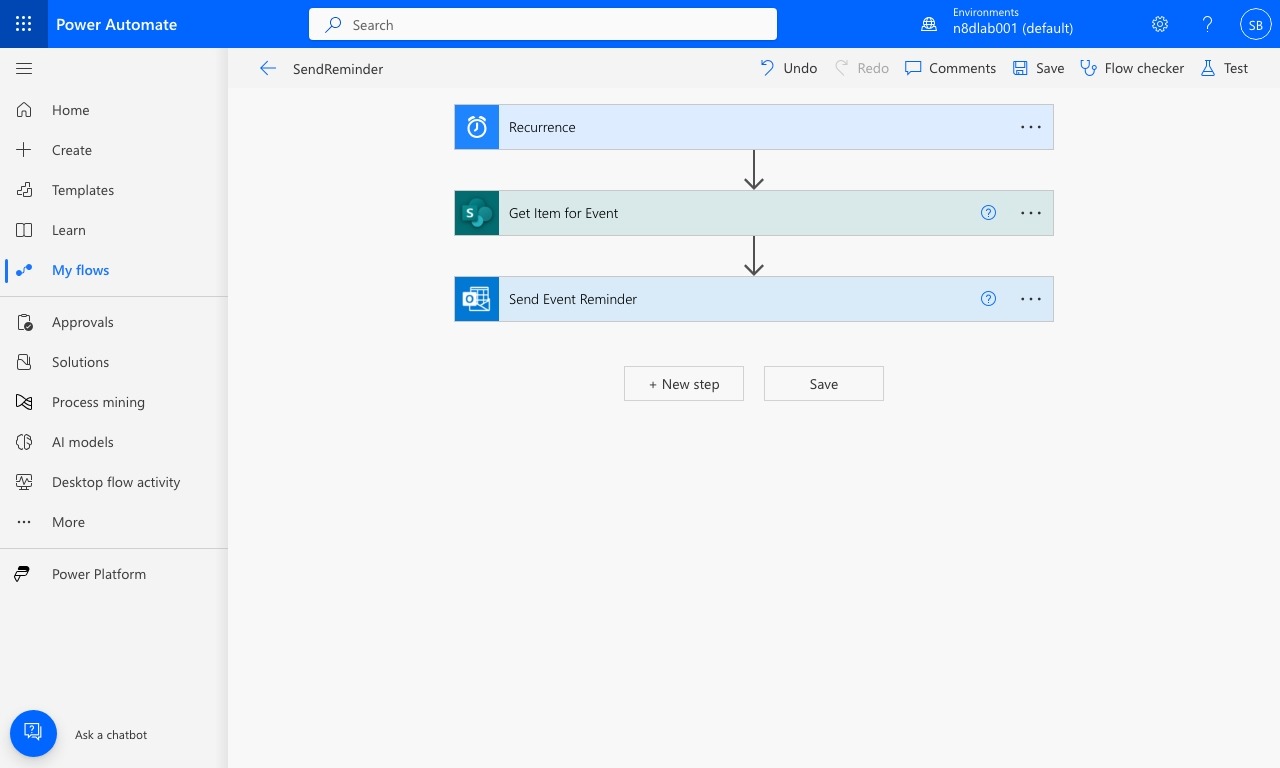
Base Power Automate Flow to get started
Nothing special at this point. I know I can only send out the mail for just one entry. In this demo, let us not overcomplicate things.
Create iCalender in Power Automate Flow
iCalendar events or ics files are text files that follow a specific pattern. In this case, the content of such a file is defined in the iCalendar (RFC 5545) specification.
Instead of manually writing such an ics file, I created an entry in Outlook and exported the event as an ICS.
The file I got looked like this:
BEGIN:VCALENDAR
METHOD:PUBLISH
PRODID:Microsoft Exchange Server 2010
VERSION:2.0
BEGIN:VTIMEZONE
TZID:tzone://Microsoft/Utc
BEGIN:STANDARD
DTSTART:16010101T000000
TZOFFSETFROM:+0000
TZOFFSETTO:+0000
END:STANDARD
BEGIN:DAYLIGHT
DTSTART:16010101T000000
TZOFFSETFROM:+0000
TZOFFSETTO:+0000
END:DAYLIGHT
END:VTIMEZONE
BEGIN:VEVENT
DESCRIPTION:\n
SUMMARY:New Calendar entry
DTSTART:20230925T093000Z
DTEND:20230925T100000Z
CLASS:PUBLIC
PRIORITY:5
DTSTAMP:20230926T133655Z
TRANSP:OPAQUE
STATUS:CONFIRMED
LOCATION:
X-MICROSOFT-CDO-BUSYSTATUS:BUSY
X-MICROSOFT-CDO-INTENDEDSTATUS:BUSY
X-MICROSOFT-CDO-ALLDAYEVENT:FALSE
X-MICROSOFT-CDO-IMPORTANCE:1
X-MICROSOFT-CDO-INSTTYPE:0
X-MICROSOFT-ONLINEMEETINGEXTERNALLINK:
X-MICROSOFT-ONLINEMEETINGCONFLINK:
X-MICROSOFT-DONOTFORWARDMEETING:FALSE
X-MICROSOFT-DISALLOW-COUNTER:FALSE
BEGIN:VALARM
DESCRIPTION:REMINDER
TRIGGER;RELATED=START:-PT15M
ACTION:DISPLAY
END:VALARM
END:VEVENT
END:VCALENDAR
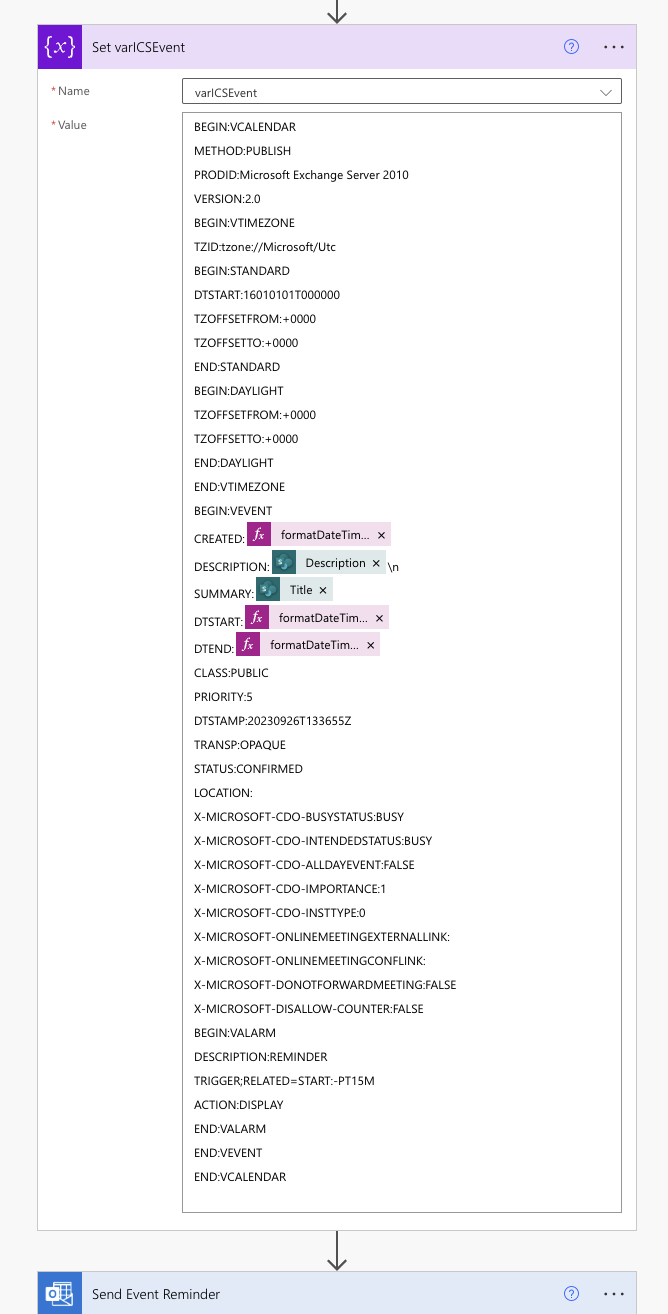
I removed two fields from the original output: UID, the unique ID for this event, and the ORGANISER because those are not required.
In the Power Automate Flow, I added two new steps: initialise a variable as a string and set the variable with the appropriate data from the list item.

Two new steps to create the iCS File Content
Created date of the ICS
The created property needs to be set in the correct format.
CREATED:@{formatDateTime(utcNow(), 'yyyyMMddThhmmssZ')}
I used the formatDateTime function as well as the utcNow() function. The format in any date time value needs to be ‘yyyyMMddThhmmssZ’.
- yyyy … year (2023)
- MM … month (09)
- dd … days (26)
- T … time delimiter
- hh … hours
- mm … minutes
- ss … seconds
- Z … TimeZone or timezone offset
Start and End date
Similar to the created, I formatted the Start Date of the event.
@{formatDateTime(outputs('Get_Item_for_Event')?['body/StartDate'], 'yyyyMMddThhmmssZ')}
As well as the End Date
DTEND:@{formatDateTime(outputs('Get_Item_for_Event')?['body/OData__EndDate'], 'yyyyMMddThhmmssZ')}
Title and Description
The iCalendar standard does not support any formats; it is a bit more complicated to bring in formatting, which is possible for Outlook or other mail clients. To keep it simple in this example, I used a plain text-only field on the list, which I can directly add to the ics file.
DESCRIPTION:@{outputs('Get_Item_for_Event')?['body/Description']}\n
In the ICS standard description, the property is used to summarise the event entry.
The event’s title is stored inside the ics summary field, and I assigned the title to this property.
SUMMARY:@{outputs('Get_Item_for_Event')?['body/Title']}
TIP I created the correct markup in Visual Studio Code. I copied the values directly out of the Power Automate Flow. It makes it easier to get the calendar entry set up right. I brought the proper event string back to the Power Automate Flow.
Final calender configuration in the Power Automate Flow
Now, you end up in your code with something like shown before.
Attach iCalendar event to mail
Once the calendar event has been correctly set up in the string, you can attach the event to a mail.
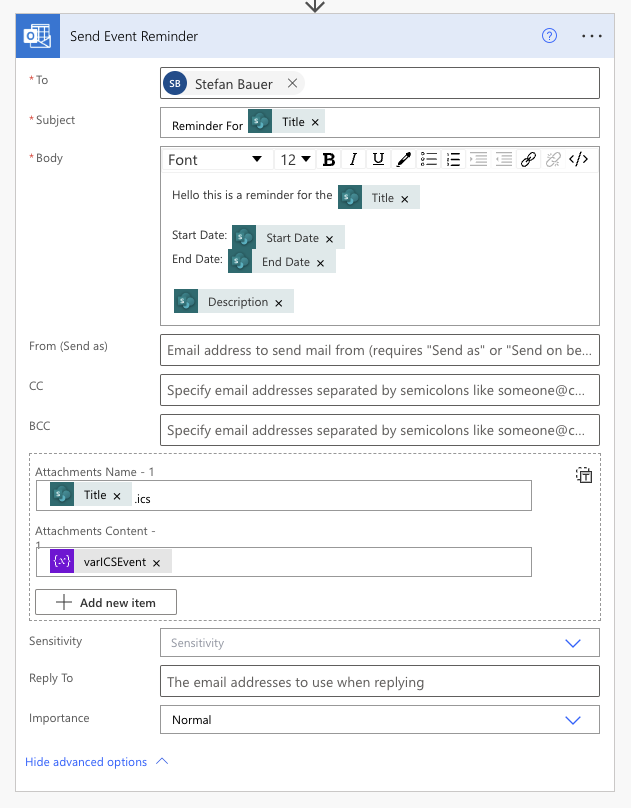
Calendar entry attachment in Power Automate Flow
You can even attach the iCalendar string to the mail like any other file. So, in the attachment name field, I added the title followed by the file extension ‘.ics’.
For the content, I added the string as the attachment’s content.
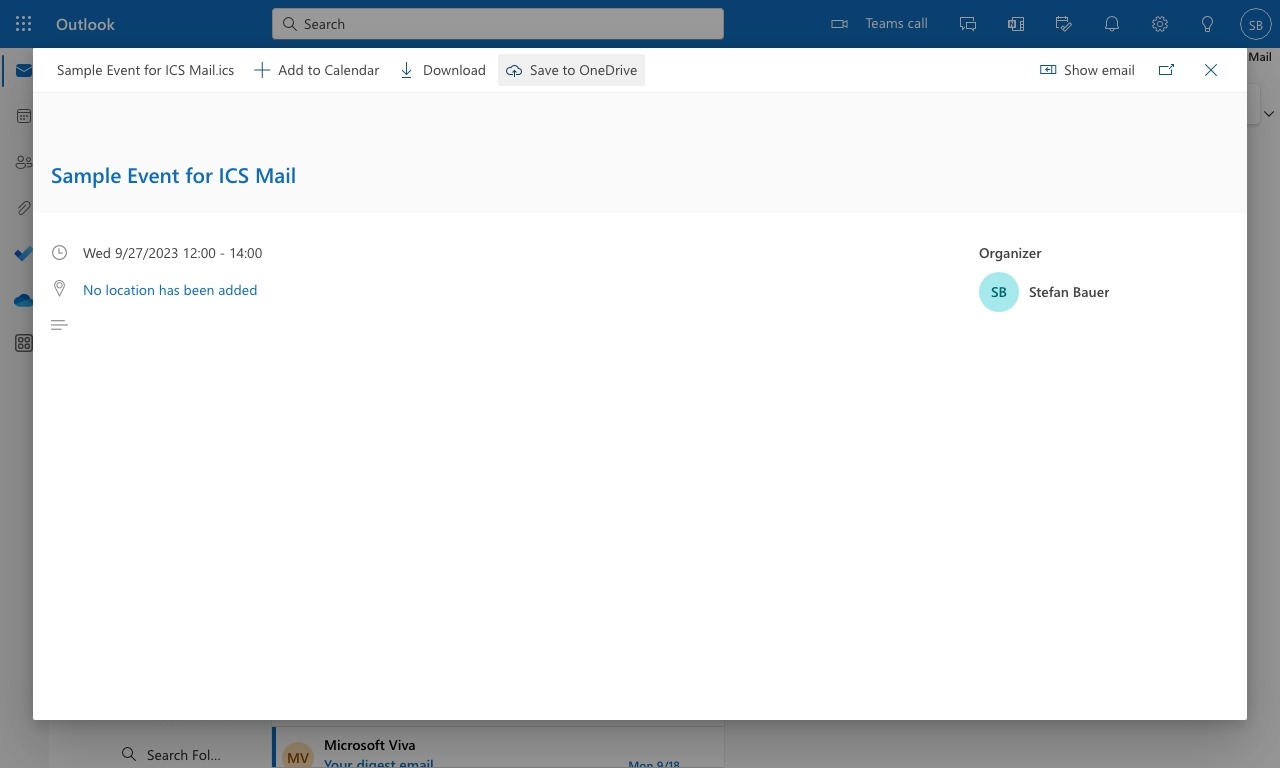
After running the workflow, I received the following mail.

Power Automate Flow mail with calendar entry attached
The event file the user could then add to their calendar is attached.

ics entry in Outlook
This way, you are able not only to send a simple reminder mail but also a calendar entry to your users.
There is only one tricky part missing. How to ensure you can update the calendar in the future in case an event changes. I know how this might work, but it’s something for another day.
If you are facing any trouble to send out the ICS you can even use the validator at iCalendar.org