Article
12 comments

Change language of UI using custom control in SharePoint 2010

In SharePoint 2010 the users now can switch the user interface between different languages if several language packs are installed. How to enable and how this works can be found on Becky Bertram’s Blog. She did a really good job on describing how you are able to enable and translate the user interface to different languages. It is also the best selection of other blog posts. That’s all about the basic from my side.

After you enabled multiple Language support for one website the user are able to switch on the so called “welcome control”, which can be found in the far right corner of the user interface.

The default control

In the master page you can identify this part with the following code:

<a href="#" tabindex="-1" style="display:none"></a><a href="#" tabindex="-1" style="display:none"></a>
<div class="s4-trc-container-menu">
    <div>
        <wssuc:Welcome id="IdWelcome" runat="server" EnableViewState="false"></wssuc:Welcome>
        <wssuc:MUISelector ID="IdMuiSelector" runat="server"/>
    </div>
</div>


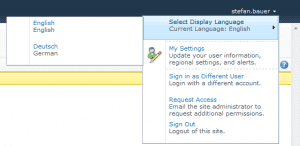
For the end user the switch between the languages will look like this:

Default MUI Selector in SharePoint 2010

So in my opinion this feature is nicely hidden in the user interface. Certain SharePoint user will find this there but what if I want to switch the language directly using the interface?

The control from above is stored in the HIVE14\Templates\controltemplates\ and is called MUISelectior.ascx. Here is the code:

<%@ Control Language="C#" Inherits="Microsoft.SharePoint.WebControls.MUISelector,Microsoft.SharePoint, Version=14.0.0.0,Culture=neutral,PublicKeyToken=71e9bce111e9429c" compilationMode="Always" %>
<%@ Register Tagprefix="SharePoint" Namespace="Microsoft.SharePoint.WebControls" Assembly="Microsoft.SharePoint, Version=14.0.0.0, Culture=neutral, PublicKeyToken=71e9bce111e9429c" %> 
<%@ Register Tagprefix="Utilities" Namespace="Microsoft.SharePoint.Utilities" Assembly="Microsoft.SharePoint, Version=14.0.0.0, Culture=neutral, PublicKeyToken=71e9bce111e9429c" %> 
<%@ Import Namespace="Microsoft.SharePoint" %> <%@ Assembly Name="Microsoft.Web.CommandUI, Version=14.0.0.0, Culture=neutral, PublicKeyToken=71e9bce111e9429c" %>
<script type ="text/javascript">
// <![CDATA[
function OnSelectionChange(value)
{
var today = new Date();
var oneYear = new Date(today.getTime() + 365 * 24 * 60 * 60 * 1000);
var url = window.location.href;
document.cookie = "lcid=" + value + ";path=/;expires=" + oneYear.toGMTString();
window.location.href = url;
}
// ]]>
</script>
<select id="DdLanguages" onchange="javascript:OnSelectionChange(this.value);" runat="server">
</select>

This control is no rocket science. What it actually does is to render all supported languages and switch the LCID using JavaScript. This also includes everything that you need to know to build your own custom control to embed directly into the master page.

What this control basically does is to render the supported languages and the JavaScript sets simply the cookie on the client to the different language. In the next steps let’s try this out with a simple web part.

Embedding with HTML Form Web Part

This will use the HTML Form Web Part because this is the only web part as far as I know allows writing JavaScript inside. What I will do is basically add two links for German and English and a little customized JavaScript. The code is also quite simple and taken and modified from the default MUI Control.

<script type ="text/javascript">
// <![CDATA[
function ChangeMUI(value)
{
var today = new Date();
var oneYear = new Date(today.getTime() + 365 * 24 * 60 * 60 * 1000);
var url = window.location.href;
document.cookie = "lcid=" + value + ";path=/;expires=" + oneYear.toGMTString();
window.location.href = url;
}
// ]]>
</script>
<a href="javascript:ChangeMUI(1031)">German</a>&nbsp;|&nbsp;<a href="javascript:ChangeMUI(1033)">English</a>


Now work done and if you click the desired language it will change the user interface to the selected language. In my case I changed the title of the website to prove if the language getting switched.

Website in English

Website in English

Website in German

Website in German

Embedding with Custom Web Part or User Control

Now that the basics are set it’s really easy to write a web part for embedding the language switch on a web part page or a user control to embedding this in the master page. The sample before is really static so it doesn’t detect the supported language dynamically. To detect all you need to use is the SupportedUI which is a SPWeb method. At the end the handling in of the language of the UI is really easy and I think the most use case for this if you have a publishing web site or a multi-language Intranet Site. SharePoint is pretty open to do custom development and some things are directly documented in the “code”, but remember: Never change default code but you can use it.
Article
0 comment

Embed SharePoint Tagging and Like Control in MasterPage

Sometimes the “tagging” and “like” control in SharePoint need to be added in different ways to meet the Design requirement. The difference between the big and the small variante of the control is to simply change the ID of the control.

<SharePoint:DelegateControl ControlId=”GlobalSiteLink3″ Scope=”Farm” runat=”server”/>
Small Tagging <SharePoint:DelegateControl ControlId=”GlobalSiteLink3-mini” Scope=”Farm” runat=”server”/>

So that is really easy and practical to use the control with the same functionality matching to your design in SharePoint.

Article
21 comments

Round corner in top navigation

The navigation in SharePoint 2010 has slightly changed and will now be rendered a new way as a list. To use list elements instead of tables is a common practice in web development. The structure of the navigation and therefore the top navigation has some important elements and style sheet classes that allow you to theme the top navigation really easy.

The Basic

The top navigation is a list as mentioned before. Inside a list element is a hyperlink that contains a span element. The source for one element on the top navigation looks like this:

<li class="static">
    <a class="static menu-item" href="/Blank">
        <span class="additional-background">
            <span class="menu-item-text">Blank</span>
        </span>
    </a>
</li>

To get a rounded navigation the background will be attached in this example to the hyperlink and the additional-background class. To reset the navigation add the follow style to your stylesheet.

.s4-tn ul li.static,
.s4-tn ul li.static.selected,
.s4-tn ul li.static a.static,
.s4-tn ul li.static a.static.selected{
    padding: 0px;
    margin: 0px;
    background-color: transparent;
    border: 0px;
    background-image: none;
}

This style removes all paddings, margins and anything else that is not needed.

The Background Image

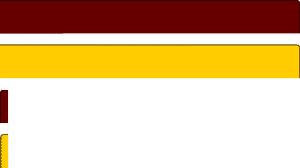
For the background images is use CSS sprite. If you don’t know what this is you can find a really good article on “A list apart”. Basically I us only a single background image and move the background around using background-position property. So the background image is use looks like this:

The red area I will use as a navigation background. The yellow will be my hover effects and also mark the selected navigation element but I will tell you later more.

The navigation

In the previous step I removed all margins and padding, which is good because now all navigation elements have now all the same values and set to zero. To attach the background I first stretch the navigation elements back to the values I will use later for the navigation.

.s4-tn ul li.static a.static,
.s4-tn ul li.static a.static.selected{
    background-color: orange;
    padding-left: 10px;
    padding-bottom: 9px;
    margin-right: 5px;
    color: white;
}
.s4-tn ul li.static a.static .additional-background{
    background-color: maroon;
    padding-right: 10px;
    padding-top: 5px;
    padding-bottom: 6px;
    color: white;
}

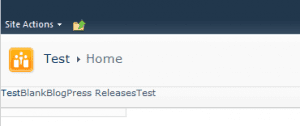
These styles above will let the top navigation look like this:

The final Step

Now to get the background image on our navigation you just need to add the background-image property to our style sheet. To get the parts of sprite in the right position we need to add the background-position too. The style sheet look then like this:

.s4-tn ul li.static a.static,
.s4-tn ul li.static a.static.selected{
    background-image: url('/_layouts/navigationtest/navigation-bg.png');
    background-repeat: no-repeat;
    background-position: left -120px;
    padding-left: 10px;
    padding-bottom: 9px;
    margin-right: 5px;
    color: white;
}
.s4-tn ul li.static a.static .additional-background{
    background-image: url('/_layouts/navigationtest/navigation-bg.png');
    background-repeat: no-repeat;
    background-position: right 0px;
    padding-right: 10px;
    padding-top: 5px;
    padding-bottom: 6px;
    color: white;
}

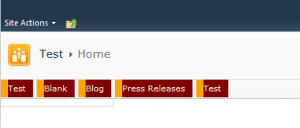
And now you have navigation with round corners then looks like this:

So this wasn’t rocket science so far and only a view line of style sheet mission can be accomplished. One thing left missing, so what about the hover? Even no problem but we need to move the background images. The style for that looks like this and hover is done.

.s4-tn ul li.static a.static:hover,
.s4-tn ul li.static.selected a.static.selected,
.s4-tn ul li.static.selected a.static.selected:hover{
    background-position: left -180px;
    color: black;
}
.s4-tn ul li.static a.static .additional-background:hover,
.s4-tn ul li.static.selected a.static.selected .additional-background{
    background-position: right -60px;
    color: black;
}

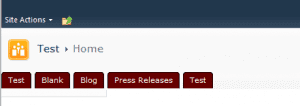
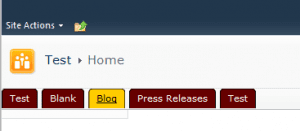
And so it should look then:

The style above also alters the style of the selected tab and the whole style adaption has only thirty two lines of pure css without any jquery or other code required.

Conclusion:

So in general Microsoft done a great job to get rid of the lame table based design to a completely more web designstandard way. Styling the navigation is one good example how easy some things have become in SharePoint 2010. The classes on the element are better structured and well attached to the elements. Simple hover effects even don’t need any scripting code at all.

Article
6 comments

Hide fields from list forms using PowerShell

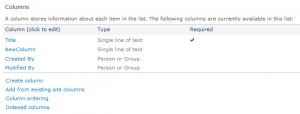
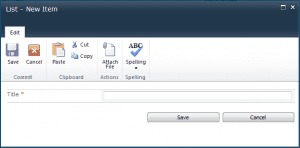
Since SharePoint 2010 was introduced there are much more ways to customize forms for list and document libraries. In most cases there is only the simple requirement to hide fields or have better control over them on lists and content types. SharePoint 2010 is the same way limited for hiding fields like it was in MOSS 2007. For advance control it was always necessary to code those fields. So first let’s take a look at how you can controls fields on the list using the normal settings dialog. The base setup in this test is a custom list called “List” with a new column called “NewColumn” which is of type single line of text.

There are no settings available where you can control where the fields should be appearing. The options to hide a field form certain forms are even not available in SharePoint. So the only way to remove the fields from NewFormDialog for example will be to set up a custom list form. No not at this stage.

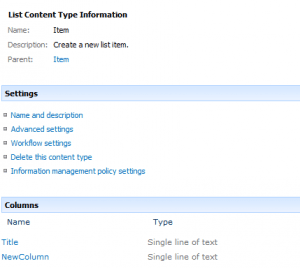
When the management of content type is enabled to the list using some advance settings will come up to the fields. This can be done in the list settings:

  • “Advanced settings”
  • “Allow management of content types”
  • “Yes”

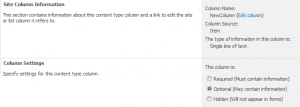
Behind ever list and library there is a content type assigned. For my custom lists this is the “Item” content type. After selecting this content type there is the “NewColumn” I created available too. On the column the following view options can be selected.

Required optional or hidden is good but won’t help in most cases. So what now? Create a custom list form? No, this is not needed.

SharePoint developer might find SPField Object from the server object model. So if a developer creates a custom content type the following options can be selected in CAML Definitions or as properties using object model.

  • ShowInDisplayForm
  • ShowInEditForm
  • ShowInListSettings
  • ShowInNewForm
  • ShowInVersionHistory
  • ShowInViewForms

I think the names of those properties are self-explaining. Is there coding needed to use those properties? Yes it is but not as a WSP. This field can set using PowerShell the following example demonstrates how to set those properties by a simple script which only opens the list using object model and sets the values, which are basically Boolean values. I use simply 0 and 1 values to set.

0         enables this property

1         disable this property

So for hiding our column in the new form dialog we just simply need to set the value of ShowInNewForm to false or 0.

# First load SharePoint Core Assembly
[System.Reflection.Assembly]::LoadWithPartialName(“Microsoft.SharePoint”)

$url = "http://myserver:Port";
$list = "List";
$fieldname = "NewColumn";

#Setting up context
$contextSite = New-Object Microsoft.SharePoint.SPSite($url);
$contextWeb = $contextSite.OpenWeb();

$list = $contextWeb.Lists.TryGetList($list);
$field = $list.Fields[$fieldname];

# Controls Field in Edit Form
$field.ShowInEditForm = 1;
# Controls Field in New Form
$field.ShowInNewForm = 0;
# Controls Field in New Form
$field.ShowInDisplayForm = 1;
# Hides fields from list settings
$field.ShowInListSettings = 1;
# Hides fields from version history
$field.ShowInVersionHistory = 1;
# Hides fields form selection in views
$field.ShowInViewForms = 1;
# Don't forget to update this field
$field.Update();
# And finally dispose everything.
$contextWeb.Dispose();
$contextSite.Dispose();

So how does it look after executing the script:

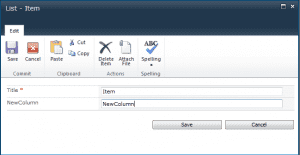
NewColumn Hidden

NewColumn is hidden on NewForm but still avaliable on EditForm.

Conclusion:

I actually can’t say what the reason is behind those properties are available using object model but not be available using the interface or SharePoint Designer. Those properties will give power user better control over their fields and will not require custom list forms using SharePoint Designer or InfoPath Forms for every simple field hiding. Those properties are not new they were still available in Moss 2007. Might this will be supported by SharePoint 2013 or 2014.

Article
1 comment

SharePoint 2010 over IE 9: The perfect combination

The upcoming version of Internet Explorer is near at first public beta. The main features of the new Microsoft Browser is focused on performance and web standard compliance. Over the last couple of weeks the last technical preview was released and the first public beta will be released on 15. September 2010.

One of the new mayor benefits in IE9 is a whole new reengineered Javascript engine named Chakra. It has the ability for better useage of multi core CPU’s. In the SharePoint 2010 the new user interface use many javascript for rendering the menus. So what could be better as a solid fast browser engine.

First of all the good news. SharePoint 2010 and IE9 works as expected, which i find quite impressing for a pre-beta technical preview. As expected the Performance of SharePoint 2010 is much more better than on IE8. Currently i haven’t done any benchmarks but from my point of view loading IE9 loads 50% faster than IE8.

If do a test yourself you must be carful because IE9 try to load SharePoint 2010 in IE8 document mode. This behaviour could be switched using “Debug” menu or simply press ALT+9 Shortcut. Only with those setting you will get the best out of performance.

The latest pre-beta of IE9 is avaliable http://ie.microsoft.com/testdrive/.
Hopefully the beta will do the job quite well too.

Let’s give it a try and tell me what you think about SharePoint 2010 and IE9.