Article
3 comments

Disable “SharePoint plugin cannot be loaded” on public facing web sites

Recently I stumbled upon various sites that are built on SharePoint 2013. All those sites have the same problem. The SharePoint plugin that those web sites try to load is only useful for collaboration but not for public facing web sites.

Plugin request in Safai

Safari and SharePoint on MacOS X

Plugin Cannot be loaded in Chrome

Chrome requests for plugin

Origin of the message

This message comes from a client side JavaScript and tries to load the presence information. To avoid this message the following lines of code needs to be added to the master page or via a JavaScript file.

function ProcessImn() {}
function ProcessImnMarkers() {}

The code to request the plugin won’t be executed anymore. The visitor can enjoy the web site instead of concentration on the source of the error message.

Using SharePoint from MacOSX? Use Safari. This is because if Office and Lync are installed on MacOS special web extensions will be installed to support working with SharePoint better.

Additional information:

Article
17 comments

Fixed width design in SharePoint 2013 – The fast way

I already provided a way to define a fixed width master page for SharePoint 2010. You might think that fixed width is not required because of all the fancy responsive web design. Mastering a fixed width design in SharePoint allow you to master responsive web design too. This is commonly known as progressive enhancements. By creating a fixed width master page first it can be easily adopted to responsive design too.

The modification are based on the seattle.html and if you haven’t done much with SharePoint Designer or master pages in 2013 I recommend you to read Master pages, the Master Page Gallery, and page layouts in SharePoint 2013 first. First I made a copy of the seattle.html because I wanted to provide the default look but add a fixed width. I also wanted to support the focus on content functionality that exists in SharePoint 2013.

Modifications in the Master Page

In SharePoint 2010 a JavaScript add the width of the current browser window to the s4-workpace element. This behavior hasn’t changed in SharePoint 2013. The good news is that applying the „s4-nosetwidth“ to the “s4-workspace” div avoids the JavaScript handler from being fired.

Before:

<div id="s4-workspace" class="ms-core-overlay">

After:

<div id="s4-workspace" class="ms-core-overlay s4-nosetwidth">

Depending on the template that will be used in another issue arises. In my case there was a problem with the float containers of an Enterprise Wiki Template. The problem with those containers is that if they haven’t been implemented properly the surrounding div will collapse and reduce its size. In worst case to height will collapse to 0px. This can be avoided by using the so-called “clearfix”. I recommend you to read all about float on CSS Tricks to get more details about this behavior.

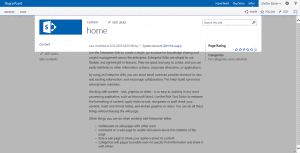
Fixed width master page without clear fix

Fixed width master page without clear fix

So to get the fix applied I decided to use the div-clearfix method. It doesn’t hurt much and also has not much impact on the over html source. The position where I placed my div can be found at the vary end of the “s4-contentrow” right before the closing div.

                </div>
            </div>
        <div class="clearfix"></div>
    </div>
</div>
<!--SPM:<SharePoint:ScriptBlock runat="server">-->


Master page is done. Now we are ready to do some CSS magic. Don’t close the master page yet. We still got something to do.

Adding Style Sheet

First we need to add a style sheet to SharePoint. The most pleasant way to do this is by adding the server control named CssRegistration. First look for the CacheManifestLink element and place the CssRegistration below.

<!--SPM:<SharePoint:CacheManifestLink runat="server"/>-->
<!--SPM:<SharePoint:CssRegistration name="&lt;% $SPUrl:~sitecollection/Style Library/fixedwidth.css %&gt;" runat="server" after="SharepointCssFile" />-->


In my case the CSS File is called “fixedwidth.css” and is stored in the Style Library.

/*** Default setup ***/
#s4-workspace{
    /* background-color of the workspace */
    background-color: silver;
}

#s4-bodyContainer{
    /* defines 960px by using 60rem = 60 * 16px (Default Font Size) */
    width: 60rem;
    margin:auto;

    /* background color of the content */
     background-color: white;
}

/*** Fix for the dialogs ***/
.ms-dialog #s4-workspace{
    background-color: white;
}

.ms-dialog #s4-bodyContainer{
    margin: 0px;
    width: auto;
}

.ms-dlgContent #s4-bodyContainer{
    width: auto;
}

/*** clear fix ***/
.clearfix{
    clear: both;
}

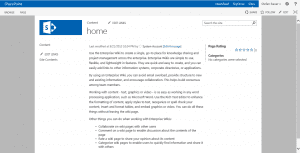
I hope that the comments in the style sheets are descriptive enough for you. Otherwise please post a comment with your questions. In the end the result should look like this.

Final fixed width master page

Final fixed width master page

You will also find he download link at he end of this article.

Finally let’s take a closer look at the em, rem and pixel values.

em, rem instead of px

Using pixel in style sheets is something from the past. You still can use it but to be more flexible it’s recommended to use relative units like em, rem or percent.

Assume you have set the font size of a div element in your design to be 12px and like to have a total width of 60px for this element. Then you can simply assign a width of 5em.

12px * 5em = 60px

If you increase the font size of that element the width will scale in proportion. Setting the font size to 14px then the width of the element will be 70px.

14px * 5em = 70px

The downside of this is that you need to know every font size of every element to assign the proper value. The good news is there is the rem unit.

Instead of referring to the current element the rem, also called root em, refers to the font size of the body, which is a static value. The default value of the body is 16px. Now if you like to get a total width of 60px all you need to do is to divide the width with the font size.

60px / 16px = 3.75rem

That is the whole concept explained in short.

Worried about the browser that understands root em? Internet Explorer 8 doesn’t understand this value but you can define a simple fallback for that. This looks for the s4-bodycontainer like this:

#s4-bodyContainer{
    /*** only for IE8 and below ***/
    width: 960px;

   /**** for the future ***/
    width: 60rem;
    margin:auto;
     /* background color of the content */
     background-color: white;
}

To get a detailed overview of browser that support rem you can browse caniuse.com.

Download fixed width master page FixedWidthMasterPage.zip

Article
0 comment

Hide Content in SharePoint from anonymous users using SPSecurity TrimmedControl

I think SPSecurityTrimmedControl was first introduced in SharePoint 2007. It is widely used to hide certain Elements based on user permission. In SharePoint 2010 a major improvement was introduced. The new property that made available was the AuthenticationRestriction, which gives you better control for anonymous and authenticated users. The possible values that can be specified are:

  • AllUsers – Access is available to all users.
  • AuthenticatedUsersOnly – Access is available only to authenticated users.
  • AnonymousUsersOnly – Access is available only to anonymous users.

If you like to use one of these values you simply need to define your security trimmed control like this:

<SharePoint:SpSecurityTrimmedControl runat=”server” AuthenticationResctriction="AuthenticateUsersOnly">
....
</SharePoint:SpSecurityTrimmedControl>

Now all controls inside the SPSecurityTrimmedControls will be hidden to anonymous users.

AuthenticationRestricion Enum on MSDN

Another great blogs concerning the topics for SharePoint 2010 is Inconvenient SPSecurity TrimmedControl – Waldek Mastykarz . I tried it in SharePoint 2013 and it worked without any problem.

This blog post is a cross post from my blog at sharepoint-community.net

Article
68 comments

Build a flexible mega drop down navigation for SharePoint

I’ve read a lot of good articles about mega menus or mega drop in the past. They all were from a technical point of view correct and useful introduction about the basics behind. When it comes to SharePoint you should always consider the user and how they can administer or change the design on their own. This is one of the strengths in SharePoint and the user should always be in the center of every solution. For a mega menu it doesn’t take much to accomplish. This can be done easily in SharePoint Designer or Visual Studio. Choose your weapon of choice and spend 30 Minutes to build up a simple but powerful mega menu.

The ingredients and how they work together

In general a mega menu is nothing more than an HTML Snippet that will be loaded when a user hover over a navigation item. This can be the top navigation or in SharePoint terms the quick launch navigation. For embedding to the quick launch the code only needs to be slightly changed.

The base of the mega menu is a customized article page that has a web part zone for the drop down content. The navigation is the out of the box navigation that should be extended for the following tasks

  • Hover over a navigation item
  • Grab the link URL
  • Load the linked page
  • Cut out the required web part zone
  • Add it to the page as the content of the mega drop down

To accomplish those tasks the well-known JavaScript library Jquery will be used.

The article page

In general to define the content of the mega menu any mega menu can be used as a starting point. The only thing that needs to be done is to encapsulate any web part zone into a <div> element.
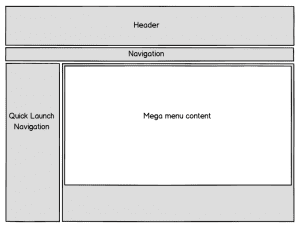
Mockup Mega Drop Down Article Page

Mockup Mega Drop Down Article Page

The code for this is simple and looks like this:

...
<ContentTemplate>
 <div class="article article-right">
 <PublishingWebControls:EditModePanel runat="server" CssClass="edit-mode-panel">
 <SharePointWebControls:TextField runat="server" FieldName="Title"/>
 </PublishingWebControls:EditModePanel>
 <div class="n8d-dropdown" id="megadropdownitem">
 <WebPartPages:WebPartZone runat="server" AllowPersonalization="false" ID="TopZone" FrameType="None" Title="<%$Resources:cms,WebPartZoneTitle_Top%>" Orientation="Vertical" />
 </div>
</ContentTemplate>
...


The script that performs the mega menu magic will simply grab the defined <div> element with all the content in it and adds it to the navigation. Then the author will be able to add content to their demand or change existing content without any single line of code. The only thing that needs to be defined is styled to show the content in a proper way.

The master page

The second thing that is required for this solution is a master page. This is only needed to register the required styles and Jquery scripts. In the default configuration of the master page SharePoint already have a fly out navigation.

....
 <script src="http://ajax.aspnetcdn.com/ajax/jQuery/jquery-1.8.2.min.js" type="text/javascript"></script>
 <script src="/_layouts/n8d.MegaMenu/MegaMenu.js" type="text/javascript"></script>
 <link type="text/css" href='/_layouts/n8d.MegaMenu/MegaDropDown.css' rel="stylesheet" />
...

To avoid possible conflicts with the script, the navigation control needs to be modified. This can be done by changing the properties for the MaximumDynamicDisplayLevels. It needs to be set from the default value which is 1 and needs to be set 0. This means that no dynamic children will be rendered.

...
<asp:ContentPlaceHolder id="PlaceHolderHorizontalNav" runat="server">
 <SharePoint:AspMenu
 ID="TopNavigationMenuV4"
 Runat="server"
 EnableViewState="false"
 DataSourceID="topSiteMap"
 AccessKey="<%$Resources:wss,navigation_accesskey%>"
 UseSimpleRendering="true"
 UseSeparateCss="false"
 Orientation="Horizontal"
 StaticDisplayLevels="2"
 MaximumDynamicDisplayLevels="0"
 SkipLinkText=""
 CssClass="s4-tn" />
   <SharePoint:DelegateControl runat="server" ControlId="TopNavigationDataSource" Id="topNavigationDelegate">
     <Template_Controls>
       <asp:SiteMapDataSource
        ShowStartingNode="False"
        SiteMapProvider="SPNavigationProvider"
        id="topSiteMap"
        runat="server"
        StartingNodeUrl="sid:1002"/>
     </Template_Controls>
   </SharePoint:DelegateControl>
</asp:ContentPlaceHolder>
...

Now that the base setup is done it’s time for some JQuery magic.

The Mega Menu Script

As mentioned before the script doesn’t do much. So when the page is loaded JQuery grabs all URL from the top navigation and looks for content that should be added to the navigation. This will be done by inserting a new <div> element directly on every item of the top navigation. This will be done by the following function.

var loadingData = function(){

    var navigationElement = $(this);
    var link = $(this).attr("href");
    var text = $(this).find(".menu-item-text").text();
    $(this).attr("linkname", text);

    $.ajax({
            url: link,
            async: false,
            dataType: "html",
            success: 
                function (data) {
                    content = $(data).find("#megadropdownitem");
                    
                    if(content.html() != undefined){
                        // fix content for calender
                        content.find(".ms-WPBody").each(function () {
                            $(this).removeAttr("webpartid");
                            $(this).removeAttr("class");
                            $(this).removeAttr("id");
                        })
                        newContent = "<div class='mdd-itemcontent'><div class='mdd-innercontent'>"+content.html()+"</div></div>";
                        navigationElement.parent().prepend(newContent);
                    }
                }
    });

}

For the animation of the flyout i simply added a hover binding to all of the navigation items.

$(document).ready(function(){

    var pageMode = $("#MSOSPWebPartManager_DisplayModeName");

    if(pageMode.val() == "Browse"){
        $(".s4-tn li.static a.static").each(loadingData);
        $(".s4-tn li.static").hover(showFlyOut, hideFlyOut);
    }
});

var showFlyOut = function(){
    if($(this).children(".mdd-itemcontent").html() != null){
        $(this).children(".menu-item").toggleClass("hover");
        $(this).children(".mdd-itemcontent").slideDown("fast");
    }
}

var hideFlyOut = function(){
    if($(this).children(".mdd-itemcontent").html() != null){
        $(this).children(".menu-item").toggleClass("hover");
        $(this).children(".mdd-itemcontent").slideUp("fast");
    }
}

The functions showFlyout and hideFlyout will show and hide the mega menu / flyout and also the class of the current selected navigation item will be toggled for a better styling. The last step was to add the design for the menu. After that the mega menu looks like this.
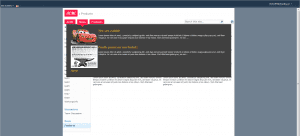
Finished look of the mega drop down

Finished look of the mega drop down

Let me show you how the solution works in the following video.

How to create a mega menu navigation in SharePoint from Stefan Bauer on Vimeo.

As seen in the solution the content of the mega drop down is flexible. Static or dynamic content can be added without changing the core functionality. No server side code is required, which makes it easy to adapt for SharePoint 2013. By changing the style sheets the form of the drop down can be easily adapted. While I used visual studio to deploy my solution this functionality can be added by using SharePoint Designer too. I think the most time consuming task in my mega menu solution are the design adoption but a simple drop down menu can be accomplished in 30 minutes. Would be great if you can share your experience with my solution. Finally what’s left to say have fun in creating you own variations.

Update Nov 19, 2013: Bugfix Calendar Web Part

As David Foster and Scott McLeod pointed out in the comments there is an error when a calendar will be used. The items were delegated to the mega menu instead of the list web part. The solution below is updated and contains the fixed version.

Download Visual Studio Solution

Article
82 comments

Turn summary link web part into an accordion

In SharePoint the summary link web part is a great tool to create overviews made of internal and external links. The challenge with this web part is to enhance the presentation when a lot of links will be added to this web part. In this post I will present how to turn this basic web part to an accordion which gives the user a much better experience.

Styling the summary link web part

First of all I created a simple summary link web part and added grouping of those links. As you see the amount of links are not that much but enough that specific links are hard to read and find the belonging groups as well.

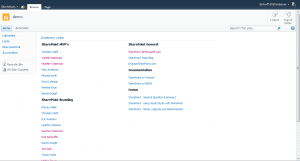
summary link web part

summary link web part

To enhance the default style I simply added a content editor web part to the page that contains my new style definition. To improve the group header I simply added a style definition for the CSS class “groupheader”. I also added some styling for the links as well.

.groupheader{
	background-color: #0072C6;
	color: white;
	font-family: "Segoe UI", Tahoma, Geneva, Verdana, sans-serif;
	font-size: 140%;
	padding: 0.5em;
	padding-left: 0.75em;
	margin-right: 0.5em;
	margin-bottom: 1px;
}

.groupmarker:hover .groupheader{
	cursor: pointer;
	background-color: #0597FF;
}

.dfwp-list{
	background-color: #0072C6;
	margin-bottom: 0.5em;
	margin-right: 0.75em;
}
.dfwp-list .item:hover{
	background-color: #0597FF;
}
.dfwp-list .link-item a{
	margin-left: 2em;
	color: white;
}

The style definitions transform the web part now into a metro styled web part. For the user experience I also added a hover effect using CSS. This allows to highlight the currently selected link.

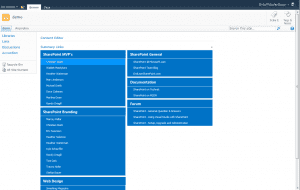
styled summary link web part

styled summary link web part

Add accordion script

The turn this web part now into a fully functional accordion all that needs to be done is to add a simple Jquery script the performs the following tasks.

  • Hide all hyperlinks in the groups
  • When a user clicks a group header
    • Hide all sections that is not the current header
    • Expand current selected link section

This can be accomplished with the following code.

$(document).ready(function(){

		/* Slide up all link items and hide them */
		$(".dfwp-list").slideUp("fast");
		/* Binding a click event handler to the links: */
		$('.groupheader').click(function(e){

			/* Finding the drop down list that corresponds to the current section: */
			var dropDown = $(this).next(".dfwp-list");

			/* Closing all other drop down sections, except the current one */
			$('.dfwp-list').not(dropDown).slideUp('slow');
			dropDown.slideToggle('slow');

			/* Preventing the default event (which would be to navigate the browser to the link's address) */
			e.preventDefault();
		})
})

Now the web part has turned into an accordion with expandable sections, but there is one last step to do. The accordion is currently not editable but this can be fixed with a simple modification of the script.

Make accordion editable again

SharePoint has something called display mode. This display mode indicates how a user has opened a page and can have the following values:

  • Browse – indicates that the user views the page
  • Design – indicates that the user tries to edit the page

Normally this form context or display mode is use is web part development but it could be used and detected using Jquery. SharePoint renders a hidden input field with the id ”MSOSPWebPartManager_DisplayModeName” that will be set to the appropriate value.

For example the field can look like this if the page is opened in browse mode.

<input type="hidden" name="MSOSPWebPartManager_DisplayModeName" id="MSOSPWebPartManager_DisplayModeName" value="Browse" />

To restore the edit function all that needs to be done is to wrap the script and let it only get executed in browse mode.

$(document).ready(function(){

	// Detect if user view or edit the page
	if($("#MSOSPWebPartManager_DisplayModeName").val() == "Browse"){
		// Register accordion
		accordion();
	}

})

var accordion = function(){

	/* Do fancy easing */
	$.easing.def = "easeOutBounce";

	/* Slide up all link items and hide them */
	$(".dfwp-list").slideUp("fast");
	/* Binding a click event handler to the links: */
	$('.groupheader').click(function(e){

		/* Finding the drop down list that corresponds to the current section: */
		var dropDown = $(this).next(".dfwp-list");

		/* Closing all other drop down sections, except the current one */
		$('.dfwp-list').not(dropDown).slideUp('slow');
		dropDown.slideToggle('slow');

	})
}

The last thing I want to show is the accordion live in action.

Download Accordion Content Editor Web Part – SharePoint 2007 / SharePoint 2010

Article
18 comments

Centered fixed width design in SharePoint 2010 – The fast way

If you are looking for a way to create a fixed width design in SharePoint 2013 follow the white rabbit.

There are a lot of fixed width master page solutions available on the internet and I read a lot of those solutions. Some of those require JavaScript or don’t respect the ribbon, which means that the ribbon will placed inside the fixed width design. SharePoint is smart enough to handle small screen resolutions by compacting and rearrange the icons in the ribbon, but if a normal user larger screen it gets really hard to administer SharePoint and breaks the usability completely. There is a much quicker and saver ways to create a flexible master page where only certain CSS properties needs to be changed to get any fixed width design as well as centered design with border to the left and right.[Read more]

Article
3 comments

Boxes and positioning – Enhance rich text editor – Part 2

Part one was all about the basics of customizing the rich text editor. This part will show some advanced CSS styling definitions. For a nice looking text layout are boxes handy to position side notes, images, videos or any kind of elements beside the content.  The rich text editor has already defined boxes in the markup styles drop down called callouts but they have a fixed position defined. I also will show enhancements for positioning any kind of element.[Read more]

Article
2 comments

Enhance rich text editor using CSS – Part 1

This is the first post in a series about enhancing the rich text editor. The rich text editor in SharePoint 2010 has changed a lot and with some creativity it can be changed and enhanced for a lot of use cases. This first article provides information of a simple addition of a link to the content. It also shows how effects like hover can be handled in the rich text editor. No JavaScript is involved only pure Css. [Read more]