I’ve read a lot of good articles about mega menus or mega drop in the past. They all were from a technical point of view correct and useful introduction about the basics behind. When it comes to SharePoint you should always consider the user and how they can administer or change the design on their own. This is one of the strengths in SharePoint and the user should always be in the center of every solution. For a mega menu it doesn’t take much to accomplish. This can be done easily in SharePoint Designer or Visual Studio. Choose your weapon of choice and spend 30 Minutes to build up a simple but powerful mega menu.
The ingredients and how they work together
In general a mega menu is nothing more than an HTML Snippet that will be loaded when a user hover over a navigation item. This can be the top navigation or in SharePoint terms the quick launch navigation. For embedding to the quick launch the code only needs to be slightly changed.
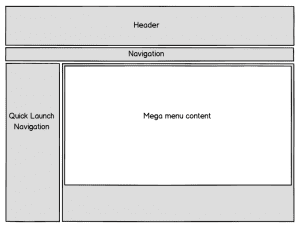
The base of the mega menu is a customized article page that has a web part zone for the drop down content. The navigation is the out of the box navigation that should be extended for the following tasks
- Hover over a navigation item
- Grab the link URL
- Load the linked page
- Cut out the required web part zone
- Add it to the page as the content of the mega drop down
To accomplish those tasks the well-known JavaScript library Jquery will be used.
The article page
In general to define the content of the mega menu any mega menu can be used as a starting point. The only thing that needs to be done is to encapsulate any web part zone into a <div> element.
The code for this is simple and looks like this:
...
<ContentTemplate>
 <div class="article article-right">
 <PublishingWebControls:EditModePanel runat="server" CssClass="edit-mode-panel">
 <SharePointWebControls:TextField runat="server" FieldName="Title"/>
 </PublishingWebControls:EditModePanel>
 <div class="n8d-dropdown" id="megadropdownitem">
 <WebPartPages:WebPartZone runat="server" AllowPersonalization="false" ID="TopZone" FrameType="None" Title="<%$Resources:cms,WebPartZoneTitle_Top%>" Orientation="Vertical" />
 </div>
</ContentTemplate>
...
The script that performs the mega menu magic will simply grab the defined <div> element with all the content in it and adds it to the navigation. Then the author will be able to add content to their demand or change existing content without any single line of code. The only thing that needs to be defined is styled to show the content in a proper way.
The master page
The second thing that is required for this solution is a master page. This is only needed to register the required styles and Jquery scripts. In the default configuration of the master page SharePoint already have a fly out navigation.
....
 <script src="http://ajax.aspnetcdn.com/ajax/jQuery/jquery-1.8.2.min.js" type="text/javascript"></script>
 <script src="/_layouts/n8d.MegaMenu/MegaMenu.js" type="text/javascript"></script>
 <link type="text/css" href='/_layouts/n8d.MegaMenu/MegaDropDown.css' rel="stylesheet" />
...
To avoid possible conflicts with the script, the navigation control needs to be modified. This can be done by changing the properties for the MaximumDynamicDisplayLevels. It needs to be set from the default value which is 1 and needs to be set 0. This means that no dynamic children will be rendered.
...
<asp:ContentPlaceHolder id="PlaceHolderHorizontalNav" runat="server">
 <SharePoint:AspMenu
 ID="TopNavigationMenuV4"
 Runat="server"
 EnableViewState="false"
 DataSourceID="topSiteMap"
 AccessKey="<%$Resources:wss,navigation_accesskey%>"
 UseSimpleRendering="true"
 UseSeparateCss="false"
 Orientation="Horizontal"
 StaticDisplayLevels="2"
 MaximumDynamicDisplayLevels="0"
 SkipLinkText=""
 CssClass="s4-tn" />
   <SharePoint:DelegateControl runat="server" ControlId="TopNavigationDataSource" Id="topNavigationDelegate">
     <Template_Controls>
       <asp:SiteMapDataSource
        ShowStartingNode="False"
        SiteMapProvider="SPNavigationProvider"
        id="topSiteMap"
        runat="server"
        StartingNodeUrl="sid:1002"/>
     </Template_Controls>
   </SharePoint:DelegateControl>
</asp:ContentPlaceHolder>
...
Now that the base setup is done it’s time for some JQuery magic.
The Mega Menu Script
As mentioned before the script doesn’t do much. So when the page is loaded JQuery grabs all URL from the top navigation and looks for content that should be added to the navigation. This will be done by inserting a new <div> element directly on every item of the top navigation. This will be done by the following function.
var loadingData = function(){

    var navigationElement = $(this);
    var link = $(this).attr("href");
    var text = $(this).find(".menu-item-text").text();
    $(this).attr("linkname", text);

    $.ajax({
            url: link,
            async: false,
            dataType: "html",
            success:
                function (data) {
                    content = $(data).find("#megadropdownitem");

                    if(content.html() != undefined){
                        // fix content for calender
                        content.find(".ms-WPBody").each(function () {
                            $(this).removeAttr("webpartid");
                            $(this).removeAttr("class");
                            $(this).removeAttr("id");
                        })
                        newContent = "<div class='mdd-itemcontent'><div class='mdd-innercontent'>"+content.html()+"</div></div>";
                        navigationElement.parent().prepend(newContent);
                    }
                }
    });

}
For the animation of the flyout i simply added a hover binding to all of the navigation items.
$(document).ready(function(){

    var pageMode = $("#MSOSPWebPartManager_DisplayModeName");

    if(pageMode.val() == "Browse"){
        $(".s4-tn li.static a.static").each(loadingData);
        $(".s4-tn li.static").hover(showFlyOut, hideFlyOut);
    }
});

var showFlyOut = function(){
    if($(this).children(".mdd-itemcontent").html() != null){
        $(this).children(".menu-item").toggleClass("hover");
        $(this).children(".mdd-itemcontent").slideDown("fast");
    }
}

var hideFlyOut = function(){
    if($(this).children(".mdd-itemcontent").html() != null){
        $(this).children(".menu-item").toggleClass("hover");
        $(this).children(".mdd-itemcontent").slideUp("fast");
    }
}
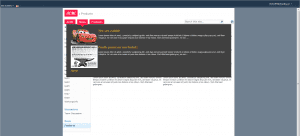
The functions showFlyout and hideFlyout will show and hide the mega menu / flyout and also the class of the current selected navigation item will be toggled for a better styling. The last step was to add the design for the menu. After that the mega menu looks like this.
Let me show you how the solution works in the following video.
How to create a mega menu navigation in SharePoint from Stefan Bauer on Vimeo.
As seen in the solution the content of the mega drop down is flexible. Static or dynamic content can be added without changing the core functionality. No server side code is required, which makes it easy to adapt for SharePoint 2013. By changing the style sheets the form of the drop down can be easily adapted. While I used visual studio to deploy my solution this functionality can be added by using SharePoint Designer too. I think the most time consuming task in my mega menu solution are the design adoption but a simple drop down menu can be accomplished in 30 minutes. Would be great if you can share your experience with my solution. Finally what’s left to say have fun in creating you own variations.
Update Nov 19, 2013: Bugfix Calendar Web Part
As David Foster and Scott McLeod pointed out in the comments there is an error when a calendar will be used. The items were delegated to the mega menu instead of the list web part. The solution below is updated and contains the fixed version.

