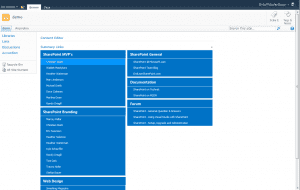
Love it or hate it, but the rich text editor can be really powerful if you know how to customize. In this article I show you how the well-known SyntaxHighlighter script by Alex Gorbatchev can be added to a wiki page in SharePoint. The idea for this came from a discussion I had with Marc D. Anderson about the Microsoft SharePoint Blog template and how hard it is to format source code in SharePoint in a beautiful way. Well nearly every WordPress blog that provides source code in the posts has a plugin that adds the SyntaxHighlighter to the design. Well here is my integration to SharePoint that consists of the following three components:
- Wiki Page Layout
- Rich Text Editor Style
- Script to embed the SyntaxHighlighter
The wiki page layout
First of all I created a specific wiki page layout to add the functionality of the SyntaxHighlighter. In this page layout I added references to a couple of scripts the SyntaxHighlighter need. I added those inside the content control with the id “PlaceHolderAdditionalPageHead”. This will render the script links to the head section of the master page.
<asp:Content ContentPlaceHolderId="PlaceHolderAdditionalPageHead" runat="server">
	<SharePoint:CssRegistration name="<% $SPUrl:~sitecollection/Style Library/~language/Core Styles/page-layouts-21.css %>" runat="server"/>

	<!-- Basic Style Definition -->
    <SharePoint:CssRegistration name="<% $SPUrl:~sitecollection/Style Library/SyntaxHighlighter/styles/shCoreDefault.css %>" runat="server"/>
    <SharePoint:CssRegistration name="<% $SPUrl:~sitecollection/Style Library/SyntaxHighlighter/SPIntegration/spSyntaxHighlighter.css %>" runat="server"/>

    <!-- Syntax Highlighter and SharePoint Integration -->
	<script type="text/javascript" src="/Style Library/SyntaxHighlighter/scripts/shCore.js"></script>
	<script type="text/javascript" src="/Style Library/SyntaxHighlighter/scripts/shBrushJScript.js"></script>
    <script type="text/javascript" src="http://ajax.aspnetcdn.com/ajax/jQuery/jquery-1.8.2.min.js"></script>
    <script type="text/javascript" src="/Style Library/SyntaxHighlighter/SPIntegration/spSyntaxHighlighter.js"></script>

	<PublishingWebControls:EditModePanel runat="server" id="editmodestyles">
		<!-- Styles for edit mode only-->
		<SharePoint:CssRegistration name="<% $SPUrl:~sitecollection/Style Library/~language/Core Styles/edit-mode-21.css %>"
			After="<% $SPUrl:~sitecollection/Style Library/~language/Core Styles/page-layouts-21.css %>" runat="server"/>
	</PublishingWebControls:EditModePanel>
</asp:Content>
Beside the SyntaxHighlighter I added one style sheet file for the integration to the rich text editor named spSyntaxHighlighter.css and a JavaScript I named spSyntaxHighlighter.js which will be used to render the source code in a proper way and uses JQuery.
Rich Text Editor Styles
To add a format block for the source code I defined for each language a specific rich text editor style. The format block using markup styles looks like this.
pre.ms-rteElement-CodeHTML{
    -ms-name: "Codebox HTML";
    border: 1px black solid;
}
What this markup style definition does is to add the <pre> tag to the content of the wiki page. For each language that should be supported I created an own markup style needs. This is required because it tells the SyntaxHighlighter script how to render the source code properly.
Script to embed the SyntaxHighlighter
As mentioned before I decided to use JQuery to execute the syntax highlighter script. Well the base task of my script is to look for the code blocks defined by the markup styles and then reformat those blocks. For an html code block the output of the rich text editor needs to be converted from:
<pre class="pre.ms-rteElement-CodeHTML">
       <p>Example paragrah in syntaxHighlighter</p>
</pre>
to this
<pre class="brush: js;">
       <p>Example paragrah in syntaxHighlighter</p>
</pre>
The script below will manage this transformation:
$(document).ready(function () {

    $("pre.ms-rteElement-CodeHTML").each(function () {
        addSyntaxStyle($(this), "brush: js");
    });

    SyntaxHighlighter.all();

})

var addSyntaxStyle = function (code, brush) {

    code.removeAttr("class");

    /*** Fixing IE stuff ***/
    var trimedCode = code.html().replace(/<br>/g, "\r\n");
    trimedCode = trimedCode.replace(/<br \/>/g, "\r\n");
    trimedCode = trimedCode.replace(/<BR \/>/g, "\r\n");
    trimedCode = trimedCode.replace(/<BR>/g, "\r\n");
    trimedCode = trimedCode.replace(/<BR\/>/g, "\r\n");
    trimedCode = trimedCode.replace(/<br\/>/g, "\r\n");

    code.html(trimedCode);
    code.replaceWith("<pre class='" + brush + "'>" + trimedCode + "</pre>");

}
For Internet Explorer I need to break the rendering of the source code inside the pre tag. The internet explorer adds additional breaks to the code. Therefore all html breaks needs to be removed and replaced “\r\n”. If those <br> tag won’t be managed the code will be messed up and the result would be only a single line of code instead of a good looking code block.
Usage
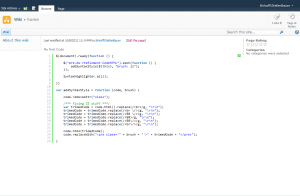
Sometimes it can be a little bit tricky to handle the rich text editor in the right way. For code embedding the best result can be achieved if the style block will be defined in the first step and later the code will be added by using the SharePoint functionality “Paste as plain text”. I recorded a simple video to show you how this works.
At the end you should get the following result.
Finally you can download this sandbox solution from Codeplex “n8d.SyntaxHighlighter”.
My integration of the SyntaxHighlighter supports currently the following languages:
- VB, C#
- HTML, XML, XHTML
- JavaScript
- SQL
- PowerShell


